How do I design threads? (3D Printing)
You can model the threads on your 3D files and they will be printed automatically!
There are 3 possible solutions for making your 3D parts threaded:
1) You can draw the hole with the thread modelled into the 3D file directly..
This solution is recommended for threads from size M5-M6.
In order to make it fully functional, we also recommend that you draw it with a suitable threading tool following the trace of the printed thread.
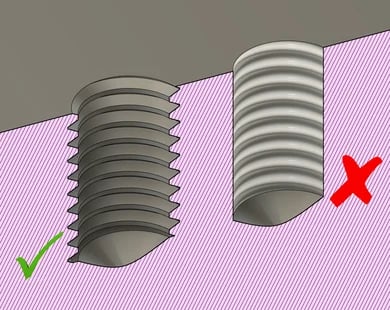
For 3D printing, it is important that at the design stage the thread is modelled and not just attributed as a property to the hole surface, look at the image below!
2) You can draw the hole with the dimensions of the pre-hole diameter required for the thread, as per ISO standards. When you receive your part, you can then use a suitable tool to make the thread.
We recommend that you draw the hole 0.2-0.3 mm narrower than the diameter in order to compensate for any printing tolerance: this will allow you to re-drill the hole with a drill before threading.
3) The last solution is offered by our threaded insert service: we recommend you take a look at this page!


