4 min read
Tensile Test: A Complete Guide for Engineers and Designers
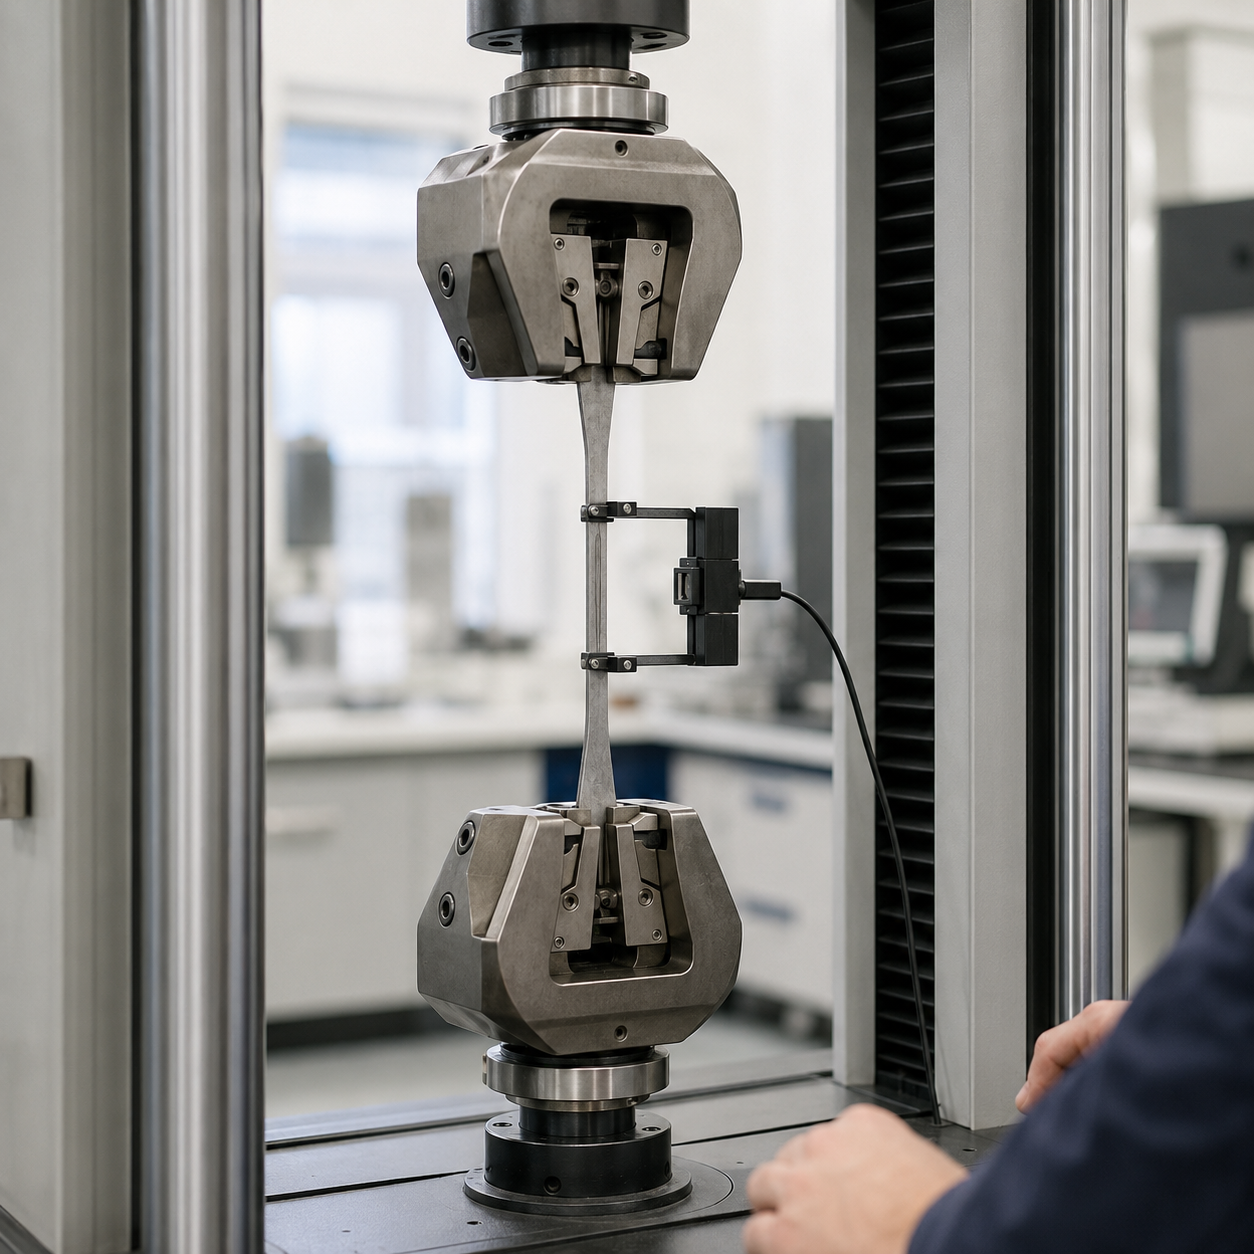
The tensile test is the most widely used mechanical test in the world for characterising materials. A single test provides the data that every...
One of the most common challenges in 3D printing is achieving a smooth surface finish.
Visible layer lines, rough textures, and small imperfections are especially common in FDM prints, but even resin and powder-based prints may require post-processing to look truly professional.
In this guide, you’ll learn how to make 3D prints smooth, covering the most effective techniques for different printing technologies, materials, and use cases.
3D prints are built layer by layer, and those layers are often visible on the final object. Surface roughness depends on several factors:
Understanding the cause helps you choose the right smoothing method.
FDM prints usually need the most finishing work due to visible layer lines.
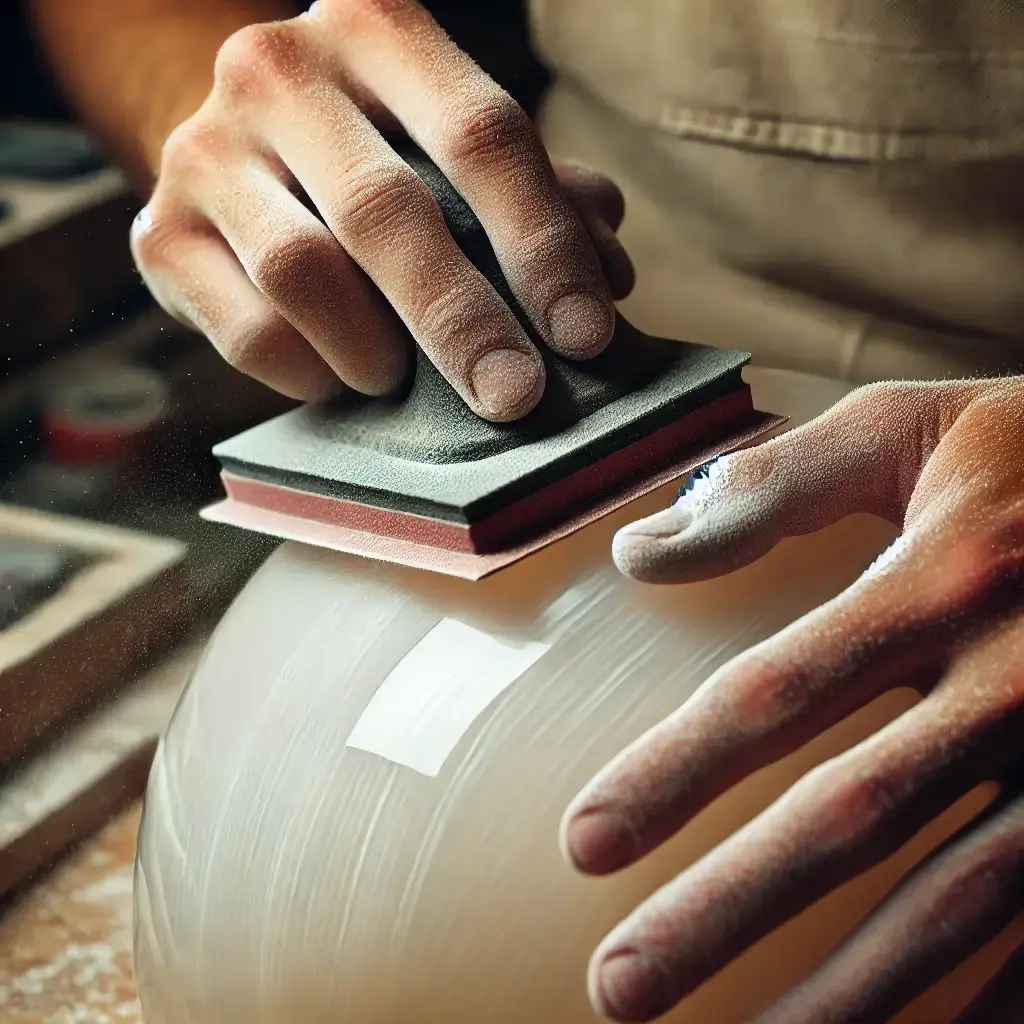
Best for: PLA, ABS, PETG, Nylon
Steps:
Pros: inexpensive, precise
Cons: time-consuming, manual effort
Best for: parts that will be painted
How it works:
Result: very smooth, paint-ready surface
Acetone slightly melts the surface of ABS, creating a glossy finish.
How it works:
Pros: excellent finish
Cons: works only on ABS, affects tolerances, requires safety precautions

A heat gun can soften surface layers.
Tip: keep the gun moving to avoid warping.
Risk: deformation and loss of detail if overheated.
Products like epoxy resin fill layer lines.
Pros: strong, smooth, glossy
Cons: adds thickness and weight

Resin prints (SLA, MSLA, DLP) already have a high-quality surface, but they still benefit from post-processing.
Incomplete curing causes sticky or uneven surfaces.
Use very fine grit (600–1000+) to remove support marks.
Enhances smoothness and prepares the part for painting.
Powder-based prints have a slightly grainy texture.
Creates a uniform, matte surface.
Used mainly for PA12 and PA11.
Benefits:
This is an industrial-grade solution, often offered by professional services.
Ideal for batches of parts with simple geometry.

Prevention is better than post-processing.
Lower layers = smoother surfaces.
Avoid steep vertical surfaces where layer lines are most visible.
Slower printing improves layer bonding and appearance.
0.2 mm nozzles produce finer details than 0.4 mm.
|
Technology |
Best Smoothing Methods |
|
FDM |
Sanding, filler primer, acetone (ABS), epoxy |
|
SLA / MSLA |
IPA wash, UV curing, light sanding |
|
MJF / SLS |
Bead blasting, vapor smoothing |
|
Metal 3D Printing |
Shot peening, machining, polishing |
Consider professional finishing if:
Industrial processes like vapor smoothing offer results that are difficult to achieve at home.

Making 3D prints smooth is a combination of:
From simple sanding to advanced vapor smoothing, there’s a solution for every project and budget.
Want perfectly smooth 3D-printed parts?
Upload your file and choose professional post-processing for a flawless finish
4 min read
The tensile test is the most widely used mechanical test in the world for characterising materials. A single test provides the data that every...

3 min read
Tensile strength is one of the most important mechanical properties in industrial design and material selection. It indicates the ability of a...
4 min read
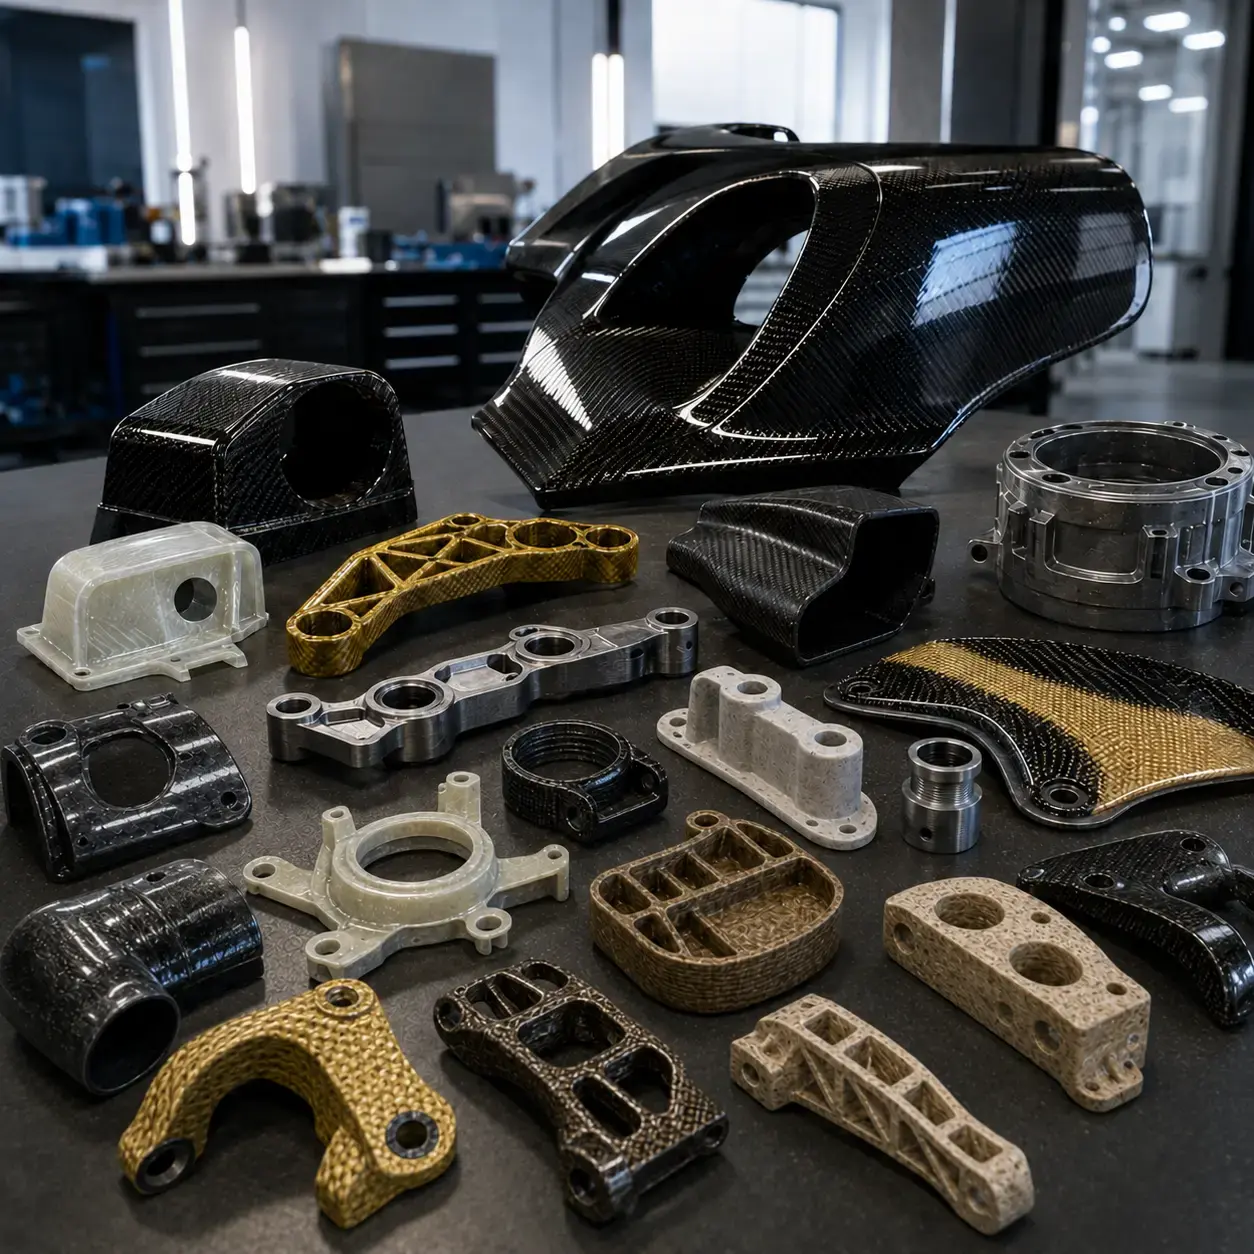
Composite materials represent one of the most significant innovations in modern engineering. Thanks to their ability to combine lightness, strength ...