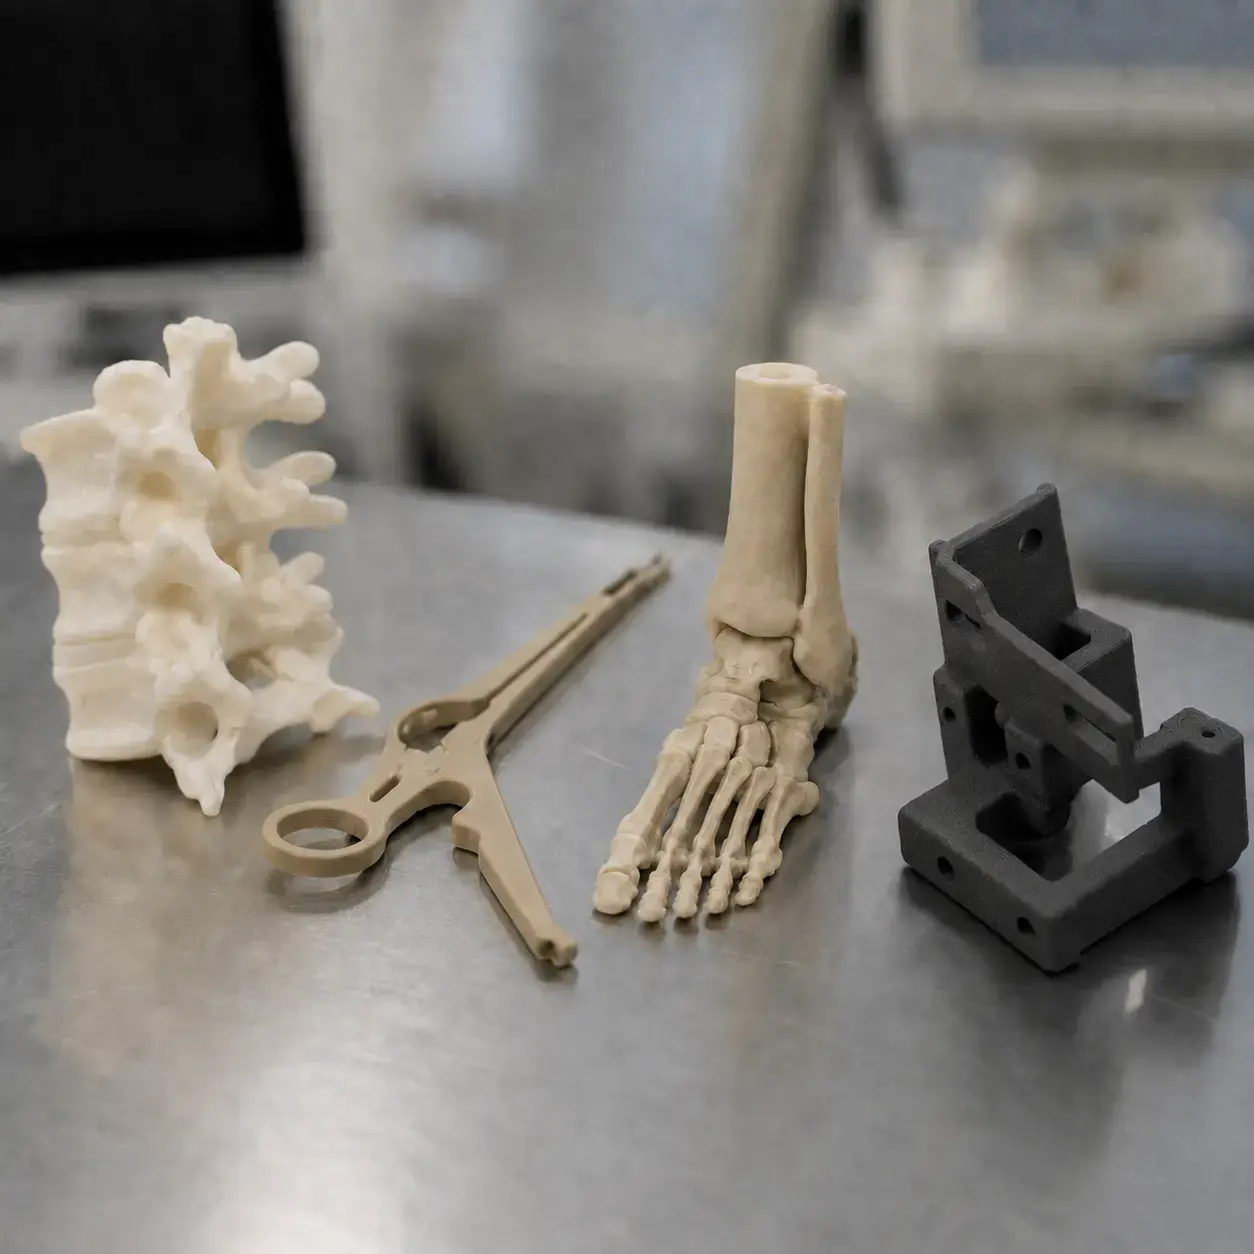
When a 3D printed component has to be assembled with screws, especially if it's intended to be opened and closed several times during its operational life, the problem of thread durability quickly emerges. The polyamides and polymers used in 3D printing don't, in fact, offer the same threading resistance as metals. A screw inserted directly into the hole of a PA12 component can withstand a few assembly cycles, but after a few tightenings the thread tends to strip, compromising the stability and reliability of the connection.
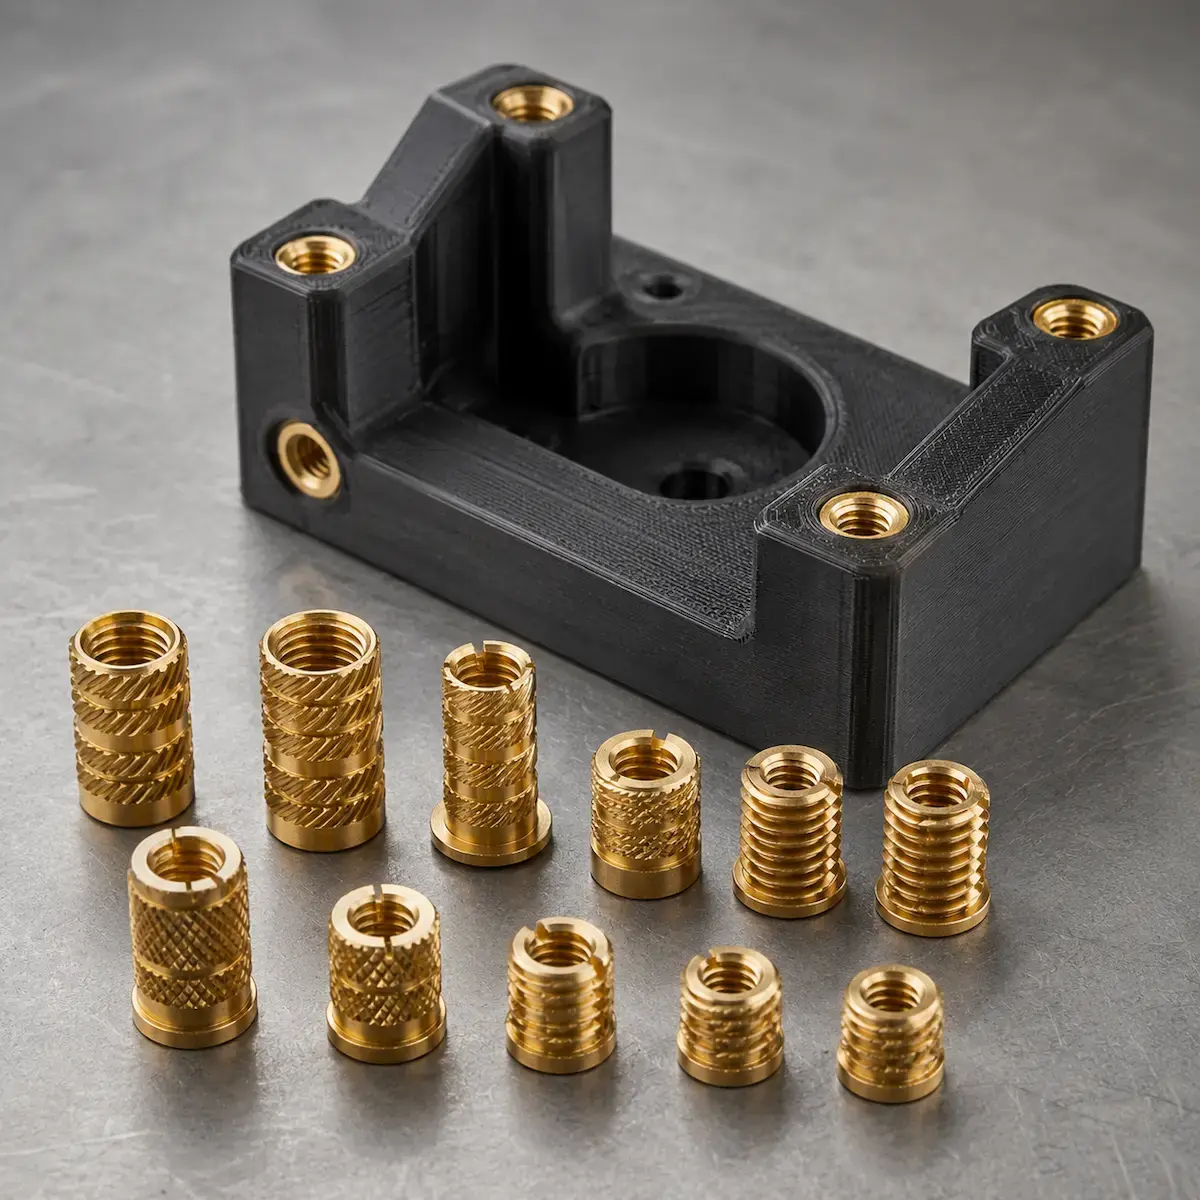
The solution is the threaded insert: a small metal bush installed inside the printed component, which creates a strong, durable thread. The insert makes it possible to apply higher tightening torques and to carry out numerous assembly and disassembly cycles without damaging the part. This guide explains the main types of threaded inserts, the available materials, the criteria for correctly designing the housing hole and the installation techniques in components made through 3D printing.
What a threaded insert for 3D printing is
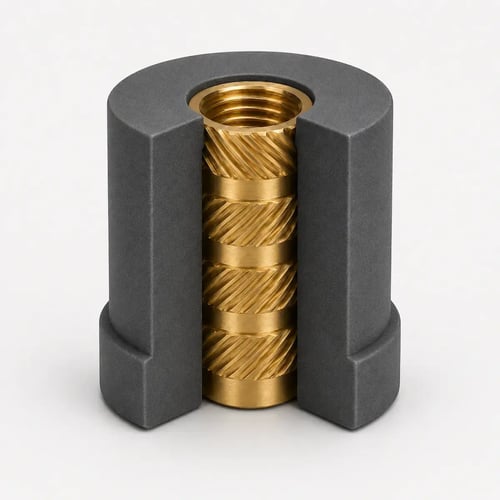
A threaded insert is a cylindrical metal component with a standard internal thread, generally metric (for example M2, M2.5, M3, M4, M5, M6, M8), and an external knurled or threaded surface designed to anchor into the material of the part hosting it.
Applied to a 3D printed component, the insert provides:
- a metal thread compatible with standard screws without deteriorating over time;
- pull-out resistance and tightening-torque resistance markedly superior to that of a thread formed directly in the polymer;
- assembly repeatability over dozens or hundreds of cycles;
- a stable, predictable and certifiable mechanical interface for the connection with other metal components.
Why are threaded inserts needed in 3D printed parts?
Threads printed directly in a polymer (even when the geometry is correct) present three structural limitations:
- lower mechanical strength than metals: polymers have elastic moduli and mechanical strengths generally lower than those of steel or brass;
- anisotropy of additive processes: in FDM, the strength in the direction of the Z axis is lower than that in the plane, and a printed thread inherits this anisotropy;
- wear due to usage cycles: every screwing and unscrewing operation can remove microscopic particles of material, causing progressive deterioration of the thread.
If the connection is permanent, is tightened only once and doesn't require high torques, a printed thread can be sufficient. When, on the other hand, the connection has to be disassembled and reassembled frequently or has to withstand significant tightening torques, the threaded insert represents the most reliable solution.
The main types of threaded inserts
There are several families of inserts, differentiated by installation method and optimised for different host-part materials. The four most relevant types for 3D printing are described below.
Heat-set inserts
These are the most widely used in 3D printed polymers. The insert is heated with a soldering iron and pushed into the prepared hole. The heat locally melts the polymer, which flows back into the knurling present on the external surface of the insert. Once cooled, the material solidifies, creating a stable anchorage.
Advantages: quick installation, excellent mechanical retention, a wide range of available sizes, a market standard. Ideal for most thermoplastic polymers.
Limitations: they require a soldering iron with a tip calibrated to the size of the insert; not suitable for thermoset materials (such as cured SLA/MSLA resins).
Press-fit inserts
These are installed by forcing them into the hole by mechanical pressure, without resorting to heat. The anchorage relies on the external knurling, which penetrates the material or deforms it locally.
Advantages: no thermal equipment needed, quick installation, good on rigid polymers. Useful for heat-sensitive materials.
Limitations: lower retention than heat-set inserts, they require accurate control of the hole tolerances. If the hole diameter is excessive, the insert can't anchor correctly; if it's too small, the component may deform or crack.
Ultrasonic Inserts
The operating principle is similar to that of heat-set inserts, but installation takes place using an ultrasonic tool. The high-frequency vibrations generate heat by friction at the interface between the insert and the polymer, locally softening the material and allowing it to flow into the external knurling.
Advantages: maximum precision and repeatability, excellent retention, a fast cycle. Suitable for high-volume industrial production.
Limitations: they require specialised equipment (a dedicated sonotrode). Less common for small runs.
Self-tapping inserts
These are screwed directly into a prepared hole, autonomously forming or cutting a thread in the polymer. The principle is similar to that of a self-tapping screw, but the insert creates a permanent metal seat into which a standard screw can subsequently be screwed.
Advantages: installation with a common screwdriver or driver, suitable for maintenance carried out directly in the field.
Limitations: lower retention than heat-set or ultrasonic inserts, not suitable for multiple installation cycles on the same hole. Used mainly for non-critical applications or for spare parts.
Insert Materials
The insert material must be chosen according to the operating environment, the expected stresses and the required tightening torque.
- Brass: it's the most common material for heat-set inserts. Excellent thermal conductivity that facilitates installation, good mechanical strength, wide availability of standard sizes and geometries. It's the reference choice for most applications.
- Stainless steel: for applications subject to corrosion, atmospheric agents, contact with water or chemical substances. Higher cost but superior resistance over time.
- Galvanised steel: a good cost/performance compromise for indoor applications, provided high humidity isn't present.
- Copper alloys: used in electrical applications where the insert also acts as a conductive contact.
How to design the hole for a threaded insert
Correct hole design is fundamental: an incorrectly dimensioned housing can compromise the performance of even the best insert. The main aspects to consider are four.
1. Hole diameter
Every insert has a housing diameter recommended by the manufacturer, which must be respected within the indicated tolerances. For heat-set inserts, the hole diameter is generally slightly smaller than the external diameter of the insert, so as to allow the softened polymer to flow back into the knurling and ensure effective anchorage. In the case of press-fit inserts, dimensional control must be even more accurate.
2. Hole Depth
The hole should be deeper than the insert by about 0.5–1 mm. This additional space allows any material displaced during heat installation to be accommodated and prevents the insert from coming into contact with the bottom of the hole before reaching the correct position.
3. Wall Thickness Around the Insert
As a rule of thumb, it's advisable to provide around the insert a material thickness equal to at least 1.5–2 times its external diameter. Insufficient thickness can cause deformations, cracks or breakages during installation and reduce the insert's retention capacity during use. In 3D printed components, this requirement often translates into the addition of local reinforcements around the insert seat.
4. Entry Chamfer
A small 45° chamfer or fillet at the mouth of the hole facilitates the insertion of the insert and reduces the risk of burrs. It's a simple detail, but an important one for achieving precise and repeatable installation.
To explore these aspects further, we invite you to consult our guide to threaded inserts for MJF and FDM printing.
Dimensions and Standards
Threaded inserts and their threads refer to international standards that define their geometries, dimensions and compatibility criteria:
- ISO 68-1: definition of standard metric threads;
- DIN 8140: reference for helical wire-thread inserts, commonly known by the trade name Helicoil;
- DIN 16903: reference for threaded inserts intended for components in plastic material.
The most widespread metric sizes in 3D printing are M2, M2.5, M3, M4, M5, M6 and M8. For specific applications, smaller sizes are also available, such as M1.6, or larger ones, such as M10 and M12.
The internal thread is generally a standard ISO metric thread, while the external geometry varies according to the type of insert and the installation method. It can therefore be knurled, self-tapping or, in the case of helical inserts, made up of a spiral-wound profile.
Comparison between the types of threaded inserts
| Type of insert |
Installation method |
Retention |
Host-part materials |
Typical production volume |
| Heat-set |
Soldering iron with calibrated tip |
High |
All thermoplastics (PA, ABS, PEEK, PETG, ASA) |
Small and medium runs |
| Ultrasonic |
Ultrasonic tool |
Very high |
Thermoplastics |
Medium and large runs |
| Press-fit |
Mechanical pressure |
Medium |
Thermoplastics, some resins |
Small runs |
| Self-tapping |
Driver |
Low/medium |
Thermoplastics |
Maintenance, spare parts |
Typical applications of threaded inserts in 3D printing
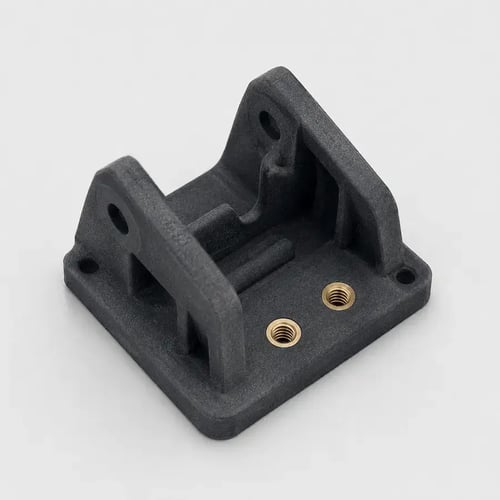
Threaded inserts are particularly useful when a 3D printed component has to be connected to metal elements, assembled with standard screws or subjected to frequent assembly and disassembly operations.
The most common applications include:
- electronic housings with removable covers for maintenance;
- industrial components with screw connections to metal subsystems;
- drones and devices assembled with screws, in which the connections are opened and closed several times during development, testing or maintenance;
- tooling, jigs and production fixtures;
- functional prototypes intended to reproduce the mechanical behaviour of the final components made through injection moulding;
- reusable medical devices with detachable parts for cleaning;
- aerospace components in PEEK or in other high-performance polymers, in which the connection has to withstand vibration, repeated loads and high tightening torques.
Insert Installation: Do-It-Yourself or Supplier Service?
Installing the inserts requires specific equipment and each part must be worked on individually. There are two main options.
In-house installation
Suitable for those who produce in-house, already have the necessary equipment, or need to make prototypes and small quantities. With an insert soldering iron costing €40–80 and calibrated tips, it's possible to install heat-set inserts on limited volumes. The operation nevertheless requires a certain amount of experience to achieve precise positioning and uniform anchorage, avoiding deforming or damaging the component.
Installation entrusted to the supplier
For production batches, entrusting the installation to the supplier is generally the most efficient solution. The supplier receives the 3D model with an indication of the position and dimensions of the inserts, makes the correctly dimensioned housing holes and completes the installation in series using professional equipment. The part is then delivered ready for use, without the need for further machining. This solution is particularly suitable for small and large runs, complex prototypes and components intended for the end customer.
In the Weerg service, the installation of threaded inserts is available as a post-production operation for components printed in MJF and FDM. You simply upload the file indicating the position and dimensions of the required inserts; the cost of the operation is then included in the quote.
Conclusion
Threaded inserts represent one of the most effective solutions for increasing the robustness, durability and repeatability of screw connections in 3D printed components, bringing their performance closer to that of injection-moulded or metal-machined parts.
Choosing the most suitable insert, correctly dimensioning the hole, as well as an installation carried out with adequate equipment, make it possible to overcome one of the main limitations of 3D printed polymers and to obtain a reliable, durable connection.
Do you have a 3D printed component that requires threaded inserts?
Upload your file and get a quote
Frequently Asked Questions About Threaded Inserts

 Weerg staff: Aug 26, 2026