Every patient has a different anatomy, and every orthosis, brace or insole should fit perfectly. Traditional orthopaedics has always known this, but until a few years ago, personalising meant resorting to plaster casts, foam models, manual working, long times and results heavily tied to the operator's experience. Today, 3D printing has radically transformed this process: from a simple scan of the patient, a custom orthosis is obtained within a few days — lightweight, breathable and reproducible.
For the orthopaedic technician and the orthopaedic workshop, 3D printing is a production tool that improves the result for the patient, reduces delivery times and opens up design possibilities unachievable with traditional methods. This guide illustrates the entire process, from the 3D scan to the finished product, the most suitable materials, the concrete advantages and how to start producing custom orthoses with additive manufacturing.
Personalisation: the real advantage of 3D printing
Personalisation is what makes 3D printing and orthopaedics a natural combination. In few other sectors is the ratio of one patient = one product so central.
With traditional methods, personalising means manually modelling every device: plaster or foam cast of the anatomical segment, creation of the positive, thermoforming and finishing. It's a long process, dependent on the operator's skill and hard to reproduce: if the patient returns after a year for a new brace, it's often necessary to start from scratch.
With 3D printing, on the other hand, personalising means modifying a digital file. The patient's anatomy is captured just once via a 3D scanner and transformed into a parametric model. From that moment, every orthosis can be produced, reproduced, modified and perfected without repeating the cast. The file becomes a permanent asset: the plaster cast is eliminated, the digital model remains.
The concrete advantages for the orthopaedic technician:
- perfect fitting based on the patient's real anatomy, not on standard sizes;
- rapid iteration: if the first fitting isn't optimal, the CAD is modified and reprinted within days;
- total reproducibility: the same brace can be reprinted identically even after a year;
- digital library of patients: every scan and every project remains archived for future updates;
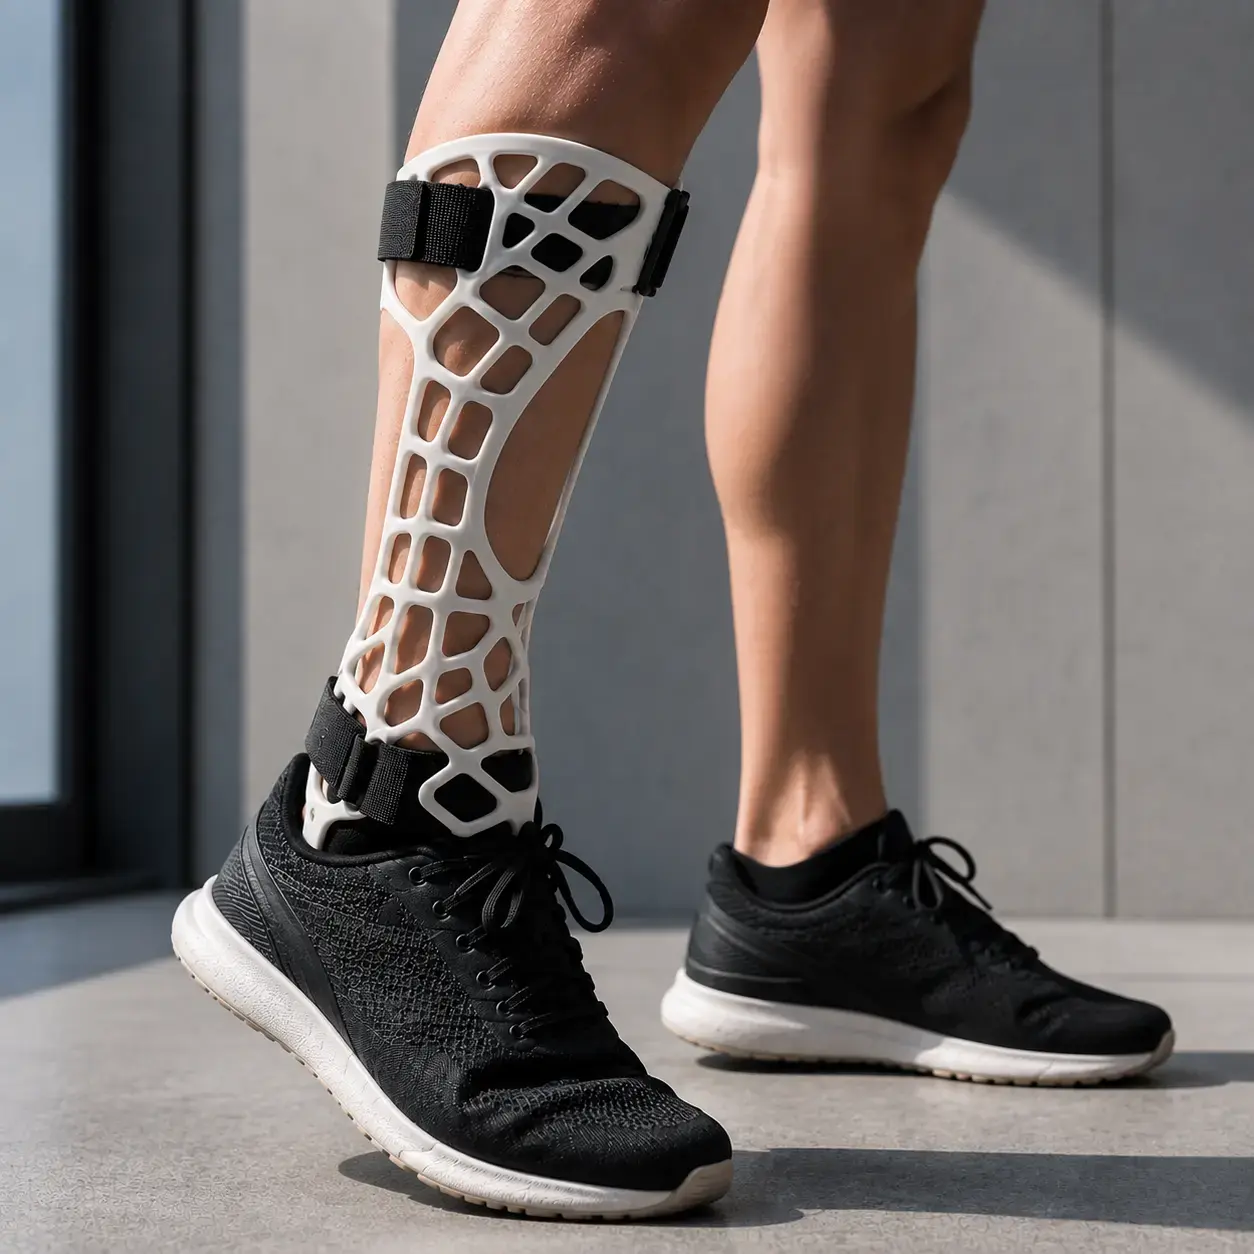
- new design possibilities: geometries impossible with thermoforming (lattice structures, patterns of variable flexibility, integrated ventilation channels).
From the 3D scan to the finished product: the workflow
The process of producing a custom 3D printed orthosis follows a five-stage workflow, from capturing the patient's anatomy to delivering the ready-to-use device.
1. Capturing the patient's geometry
The anatomical segment (foot, wrist, ankle, knee, hand, spine) is captured via a portable 3D scanner or a photogrammetry app for tablet or smartphone. The system generates a point cloud or a mesh that digitally reproduces the patient's surface in STL, OBJ or PLY formats.
Scanners for orthopaedic applications reach a precision of about 0.5-1 mm, adequate for most orthoses. Some systems also allow plantar scanning under load, with the patient standing on the platform, essential for the creation of functional insoles.
Time: 2-5 minutes. No contact with the patient, no cast and no mess.
2. CAD design of the orthosis
The scan file is imported into a CAD software dedicated to orthopaedics (Rodin4D, Vorum, Orten, Autodesk Meshmixer, or proprietary software) where the technician:
- defines the offloading and contact zones according to the pathology;
- sets the wall thickness and the stiffness in the various areas;
- adds ventilation lattices, breathable openings and lightening holes;
- inserts variable-flexibility zones to guide articular movement;
- designs the fastenings (velcro, clips, straps) and the interfaces with footwear or clothing;
- integrates custom aesthetic elements (colours, textures, graphics for paediatric patients).
The result is an STL file ready for printing, optimised for the chosen production process.
3. Preparation and 3D Printing
The file is uploaded to the production platform. According to the material and the chosen technology:
- MJF (Multi Jet Fusion) for orthoses in PA12 or PA11 nylon and for flexible components in TPU: no supports, efficient series production and isotropic properties;
- industrial FDM for rigid components in Medical ABS intended for contact with the skin.
Printing takes 1-3 working days with MJF technology, with similar times for FDM. The orthopaedic technician can thus go from Monday's scan to the orthosis ready for fitting by Friday.
4. Post-processing and finishing
After printing, the orthosis is:
- sandblasted (MJF) to make the surface uniform;
- possibly treated with vapor smoothing to make it water-repellent and smooth to the touch on the skin;
- assembled with inserts (velcro, buckles, TPU padding) if provided for;
- dimensionally checked on the critical measurements;
- packaged and shipped.
5. Fitting and Delivery to the Patient
The orthosis is tried on during a fitting session, in which the technician verifies comfort, functionality and adherence, correcting any details. If modifications are needed, the CAD file is updated and the new version reprinted within a few days, rather than weeks as in the traditional process.
Materials for orthoses: comfort, strength and flexibility
The choice of material determines the behaviour of the orthosis in contact with the patient. Three families of materials cover almost all orthotic applications.
Nylon PA12 (MJF): the structure
PA12 nylon printed in MJF is the reference structural material for 3D printed orthoses. It combines mechanical strength (48 MPa), lightness (1.01 g/cm³), good fatigue resistance and USP Class VI certification. It's suited to:
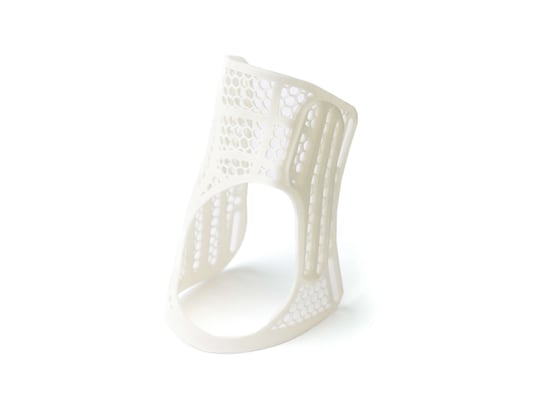
- rigid and semi-rigid orthoses for wrist, ankle and knee;
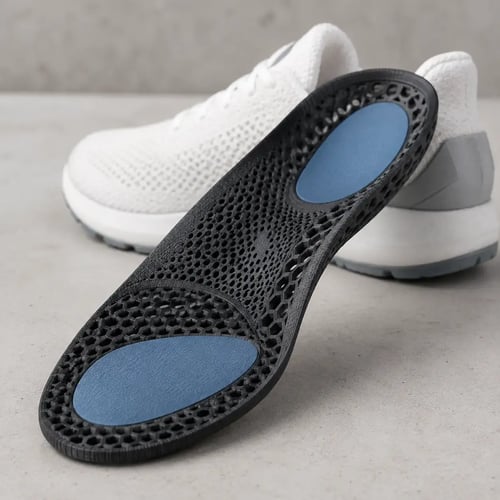
- functional insoles with reduced thicknesses and differentiated flexibility;
- braces with complex geometries, lattice structures and ventilation patterns;
- load-bearing structures of multi-material orthoses.
With the vapor smoothing finish, the surface becomes smooth and water-repellent, eliminating the granularity typical of MJF and making the orthosis easier to clean.
PA11 Gen 2 Nylon (MJF): Fatigue Resistance
PA11 Gen 2 nylon presents an elongation at break of 27.5%, higher than that of PA12 (20%). It's therefore preferable for orthoses subject to repeated flexing during the step or articular movement, such as dynamic insoles, posterior springs for AFO (Ankle Foot Orthosis) and devices that must deform elastically without breaking.
It's also of biological origin, since it derives from castor oil, offering an advantage to companies with sustainability objectives.
TPU: comfort in contact with the skin
TPU (thermoplastic polyurethane) is suited to the parts in direct contact with the patient, where softness, elasticity and shock absorption are needed. Printed in MJF, it's used for:
- comfortable padding and interfaces between rigid orthosis and skin;
- soft or cushioning insoles for diabetic patients or those with reduced sensitivity;
- anti-vibration and anti-shock elements in orthoses for walking;
- flexible fastenings and integrated straps;
- protections on rigid edges to prevent irritation.
TPU resists UV rays and hydrolysis, maintaining stability over time even in orthoses used daily.
Multi-material combination
The most advanced orthoses combine rigid structures in PA12 or PA11 with soft interfaces in TPU, mechanically assembled or bonded. The designer can thus calibrate the stiffness zone by zone: greater support where necessary, flexibility in the areas of movement and softness in the points of contact with the skin.
Lightness and breathability: two concrete advantages
Two characteristics immediately distinguish 3D printed orthoses from traditional ones, with benefits perceptible by the patient.
Lightness
A 3D printed PA12 orthosis generally weighs 30-50% less than an equivalent model in thermoformed polypropylene. This result derives from the low density of PA12, from the possibility of varying the thicknesses according to structural needs and from the use of lattices that reduce the mass while maintaining stiffness. For those who wear the orthosis 8-16 hours a day, every gram counts.
Breathability
Traditional thermoformed orthoses are closed shells that retain heat and humidity, especially in summer or in patients with sensitive skin. 3D printing makes it possible to integrate directly into the structure calibrated holes, organic grids and open lattices, favouring the passage of air and humidity without compromising stiffness.
The result is an orthosis that's better tolerated, worn more willingly and for longer, with positive effects on therapeutic adherence.
Custom series production
The economic model of 3D printing for orthoses isn't based on the production of a single piece, but on the custom series.
An orthopaedic workshop that makes 500 different insoles every week can insert them into a single MJF batch. The machine produces them simultaneously in the same cycle, each with the specific geometry of the patient. The unit cost is comparable to that of series production, but every device is unique.
This model is naturally scalable:
- artisan workshop: 5-20 orthoses a week, with a weekly batch;
- medium orthopaedic centre: 50-100 orthoses a week, with a daily batch;
- industrial producer: hundreds or thousands of orthoses a week, with continuous production.
In every case, the flow remains unchanged: scan → CAD → file upload → printing → post-processing → fitting. No moulds, casts or warehouses of semi-finished products are needed.
Delivery times: thanks to the immediate online quote and MJF production in 1-3 working days, the entire cycle, from the scan to delivery, can be completed in less than a week, compared with the 2-4 weeks of the traditional process.
A concrete case: orthopaedic workshop for custom insoles
An orthopaedic workshop in Northern Italy produced custom insoles with the traditional method: foam cast, plaster positive and milling from an EVA block. The delivery times were 10-14 days, with a capacity of 15-20 pairs a week, limited by artisan labour.
With the switch to 3D printing in TPU MJF, the process comprises plantar scanning under load, CAD design, uploading to the production platform, batch printing and delivery. The time is reduced to 5 days and the capacity becomes scalable.
The insole is lighter, more precise and reproducible, as well as allowing offloading zones and flexibility patterns hard to obtain with milling.
 Conclusion
Custom 3D printed orthoses, braces and insoles represent today the most efficient way to combine anatomical precision, lightness, breathability, speed and reproducibility. For the orthopaedic technician and the workshop, 3D printing doesn't replace clinical competence, but enhances it, offering design possibilities unachievable with traditional thermoforming and a production cycle measured in days, not weeks.
With PA12 and PA11 nylon for the structures, TPU for the comfortable interfaces, vapor smoothing for smooth, water-repellent surfaces and batch MJF production in 1-3 working days, taking an orthosis from the scan to the patient is today a matter of digital workflow, not of casts, moulds and waiting.
Do you produce custom orthoses, braces or insoles and want to switch to 3D printing?
Upload your file and get a quote
Frequently Asked Questions

 Weerg staff: Sep 30, 2026